Where to find the SQL 64 bit Native Client for vCenter Installs
Microsoft® SQL Server® 2008 R2 Native Client X64 Package (sqlncli.msi)
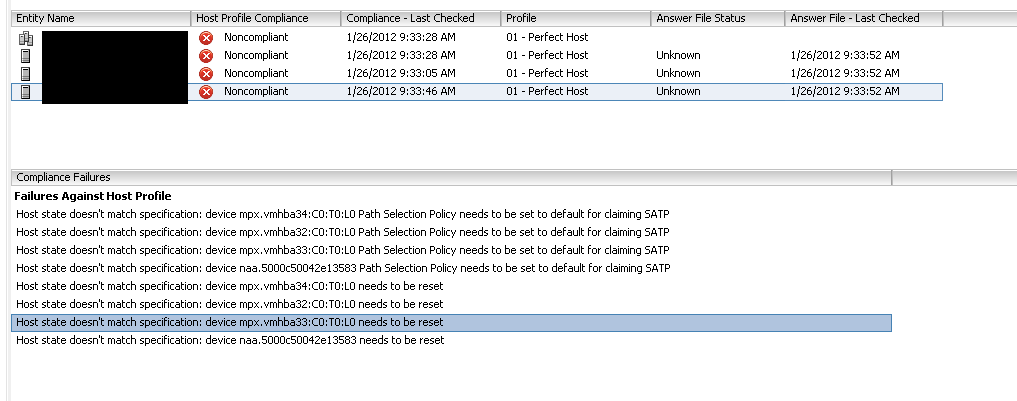
I am trying to use host profiles in a full NFS vCenter, no block level storage other than the local SSD disks for the ESXi 5 servers to boot from and some various emulated CDROM’s attached to some of the hosts. Because I don’t really care about the uniformity of my local storage I just want to ignore these errors and get a Green “Compliant” result for my cluster so I can fix the important issues. I tried going into Edit Profile and removing a lot of data from under Storage Configuration/PSA & NMP & iSCSI, but this led to more errors, such as below:
Failures Against Host Profile
Host state doesn’t match specification: device mpx.vmhba32:xx:xx:xx Path Selection Policy needs to be set to default for claiming SATP
Host state doesn’t match specification: device mpx.vmhba32:xx:xx:xx needs to be reset
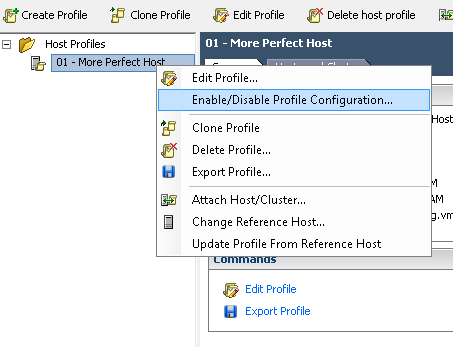
To resolve the issue, you need to right click on the Actual storage profile under “Host Profiles” on the left hand side of the screen and choose “Enable/Disable Profile Configuration…”
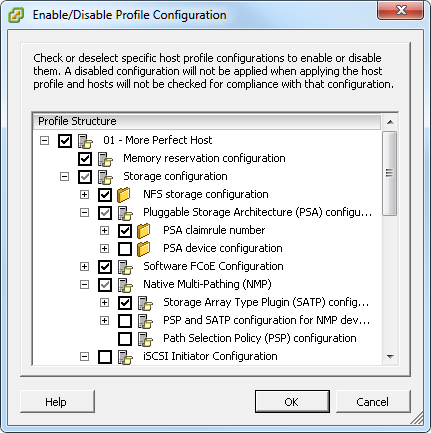
Then unselect items from here such as PSA device configuration and whatever else causing you unnecessary grief.
After hitting OK, rescan your hosts and you should finally get your Green Light!
Credits go to the knowledge base and to Kevin Space.
When using ESX on a server it is good to have a lot of network cards, especially if using vCD (vCloud) . This is a follow up to my previous post about dividing a single Dell NIC into multiple nics (partitioning) http://bsmith9999.blogspot.com/2012/01/divide-single-network-into-multiple.html.
Before you begin, you need to design your setup, for my example I want 9 VLAN’s.
1010 – mgmt (the vCenter & vCM & vCell, etc…)
1020 – guests (external facing)
1030 – vMotion
1040 – NFS (not using FC)
4010 – vcdni1
4020 – vcdni2
4030 – vcdni3
4040 – vcdni4
4050 – vcdni5
Step 1 Login and look around.
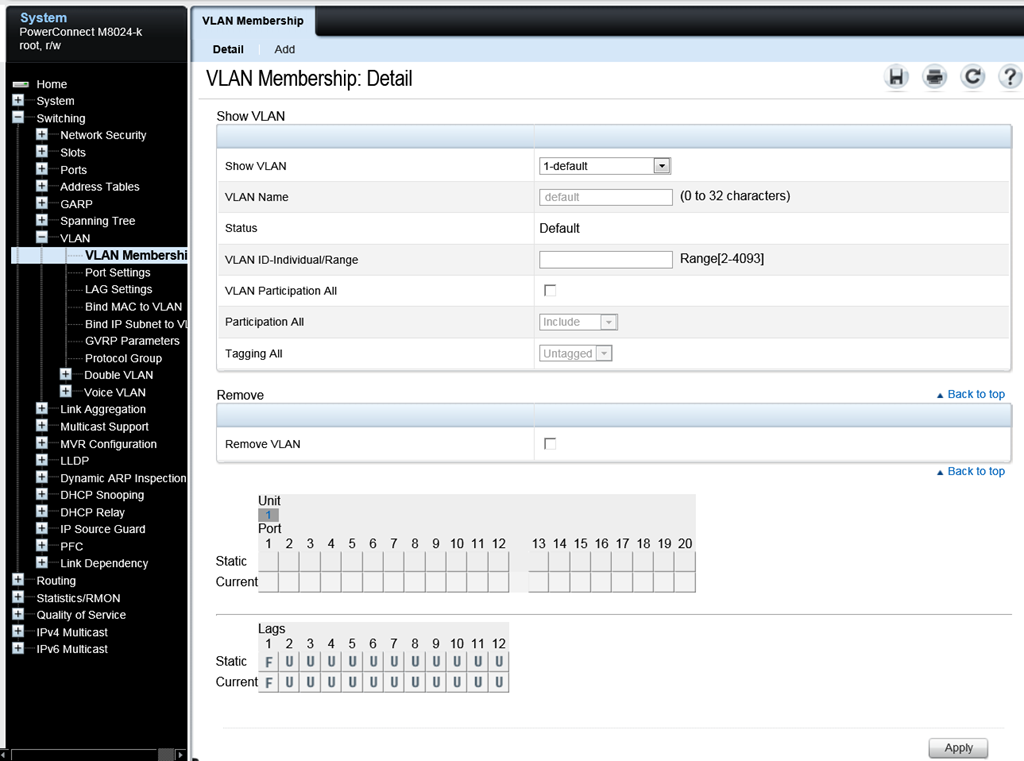
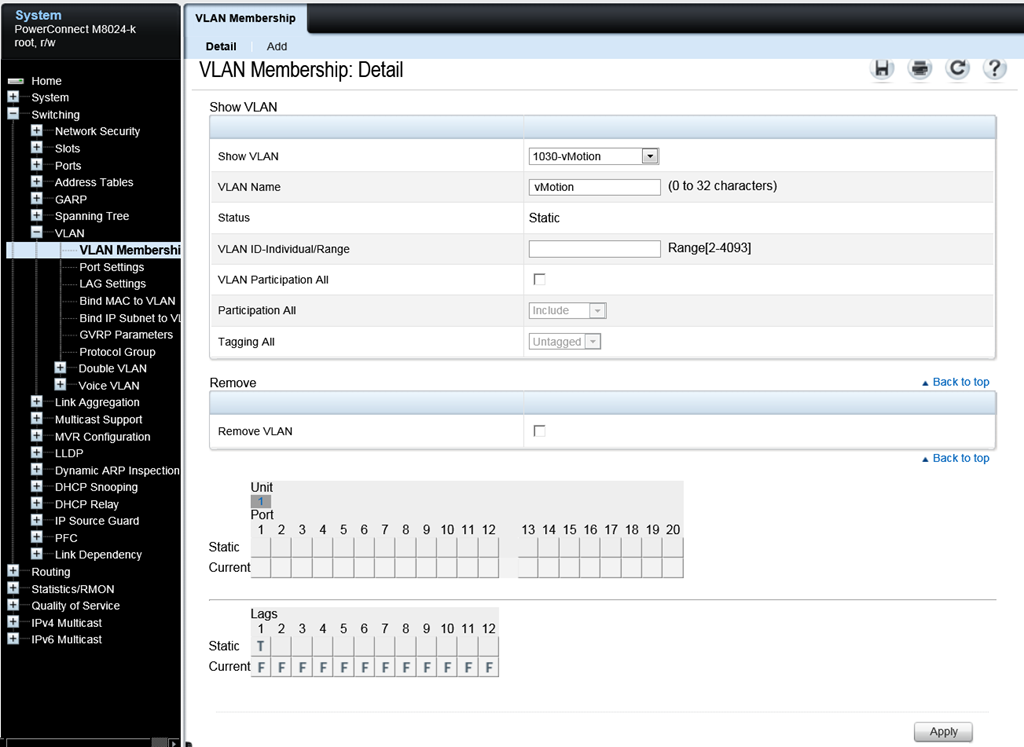
Login to Dell OpenManage, Open Switching/VLAN/ choose “VLAN Membership”. Out of the box you will only see the default VLAN 1. Assuming you are using multiple chassis with clusters that will span these chassis like I am, you will need Tagging to flow through your core switches into these. On this default VLAN, you will see the “Lags” at the bottom left hand side, the Current is set to “F” which is forbidden, meaning this default VLAN will not pass through the trunk into the core switch and cross chassis, for the default VLAN 1, this is good, for the other VLANs, we will change it.
Step 2, Add VLAN’s.
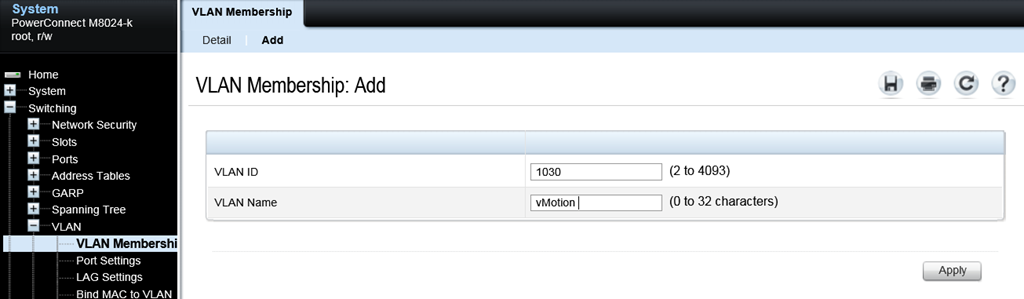
Under “VLAN Membership”, click “Add” near the top, type in your VLAN ID and name, then click Apply. Repeat step to create all of your VLAN’s.
Step 3, Change VLAN Lag type to Tagged.
Click on Detail after you have created your VLANs. Choose your VLAN under “Show VLAN”, Under Lags, change the “Static” box from “F” to “T” by clicking it a couple times. Then click apply, repeat for all new VLAN’s you’ve created that you want to have flow through your core network.
Step 4, Change VLAN Port Settings to “Trunk”
**Warning** before you do this, you must have iDRAC console access to your blade or you may lose connectivity to it****
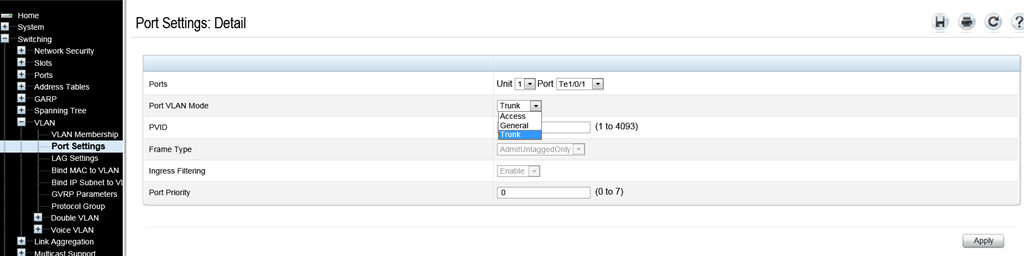
Click on “Port Settings” which is just below “VLAN Membership”. You will now see the port Detail page. For each Port Te1/0/1 through Te1/0/16 change the Port VLAN Mode from Access to Trunk, then Click Apply. This will allow the blades to pass multiple VLAN networks to and from themselves. Repeat this step 16 times.
Step 5, Modify ESXi to accommodate the new VLANs
Open a iDRAC session to your blade(s). F2 to Login, Choose “Configure Management Network”, Choose “VLAN (optional)”, then type in your VLAN ID
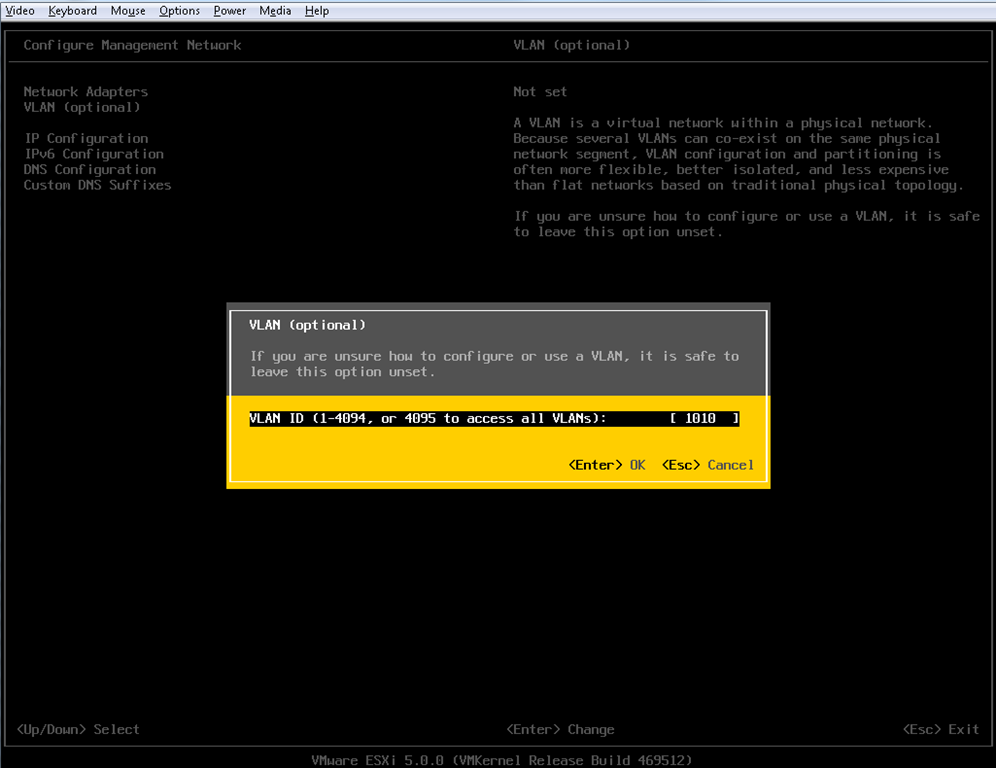
Hit Enter, then ESC. It will ask if you want to Apply changes and restart mangement network? Say (Y)es.
NOTE ***In the dell Switch UI, make SURE to click the little floppy disk picture in the upper right to Save your work when your done or you’ll get to repeat it after your next power outage like I did***
You should be done, repeat these steps to get all your blades online and using VLAN’s.
I was looking for the Dell equivolent to HP Flex-10’s FlexFabric Adapter. In dell speak this is called “independent NIC partitioning“ or just “NIC partitioning” or NPAR.
First let me give you some background into my new system. It consists of M1000E blade cabinets, M710HD Blade Servers with Broadcom 57712-k 10GbE 2P nics, and PowerConnect M8024-k Cabinet Switches. My goal is to turn two 10GB NIC’s into four NIC’s made up of two 1GB NIC’s and two 9GB NIC’s
Before you connect to iDRAC, If you want to use your mouse, you must set the Mouse Mode to USC\Diags (also don’t do this through remote desktop) Make this change from the iDRAC GUI. I always change the media to attach or I won’t be able to install ESX later.
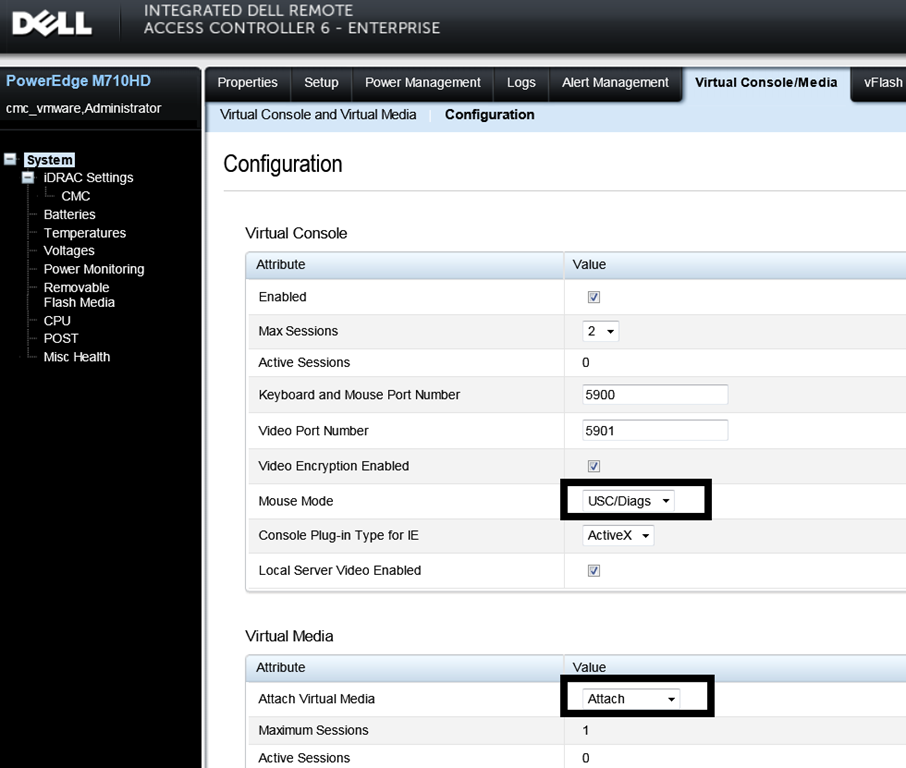
Apply the setting, make sure to wait for the confirmation, otherwise it didn’t happen.
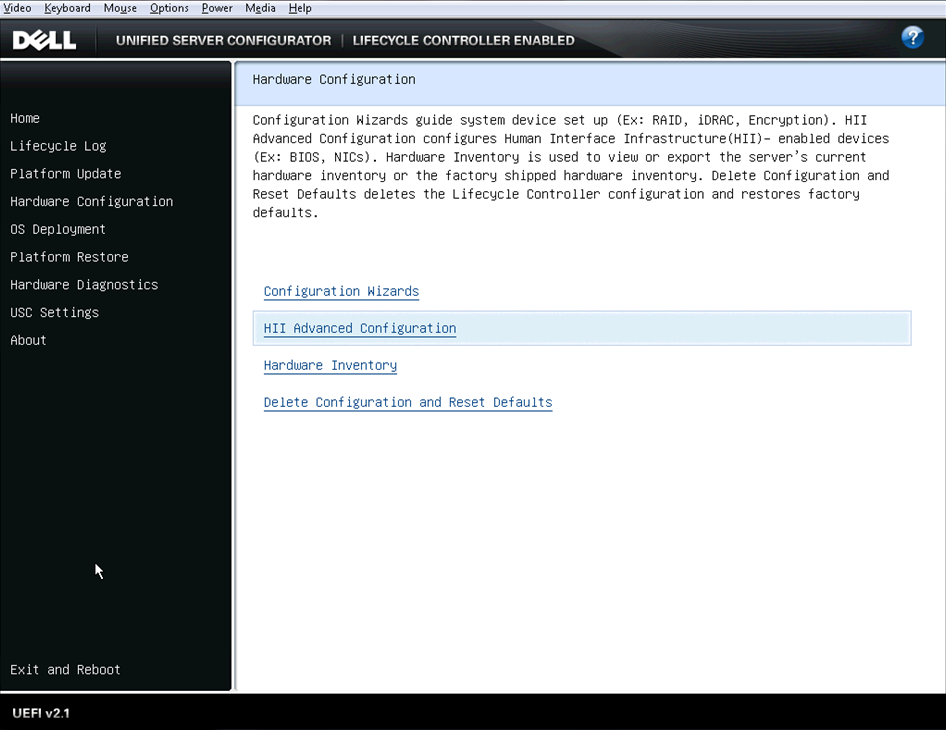
To make the actual NIC Partitioning changes, you must use the ""Dell Unified Server Configurator”, which being the noob I am, I tried to find for download, but apparently you access it during the blade server boot by pressing F10 to access the UEFI (System Services")
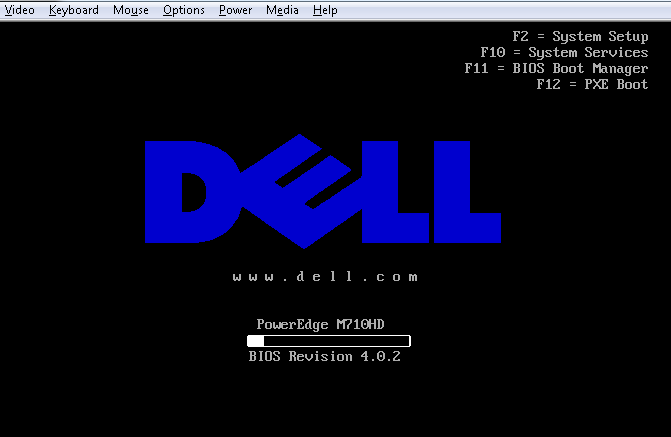
Then you will see something like this when it boots to UEFI
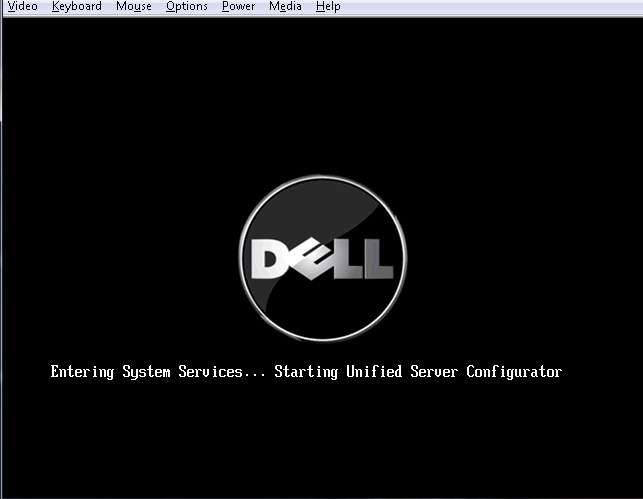
Select “Hardware Configuration”, you can do that with your mouse or the arrows on the keyboard.
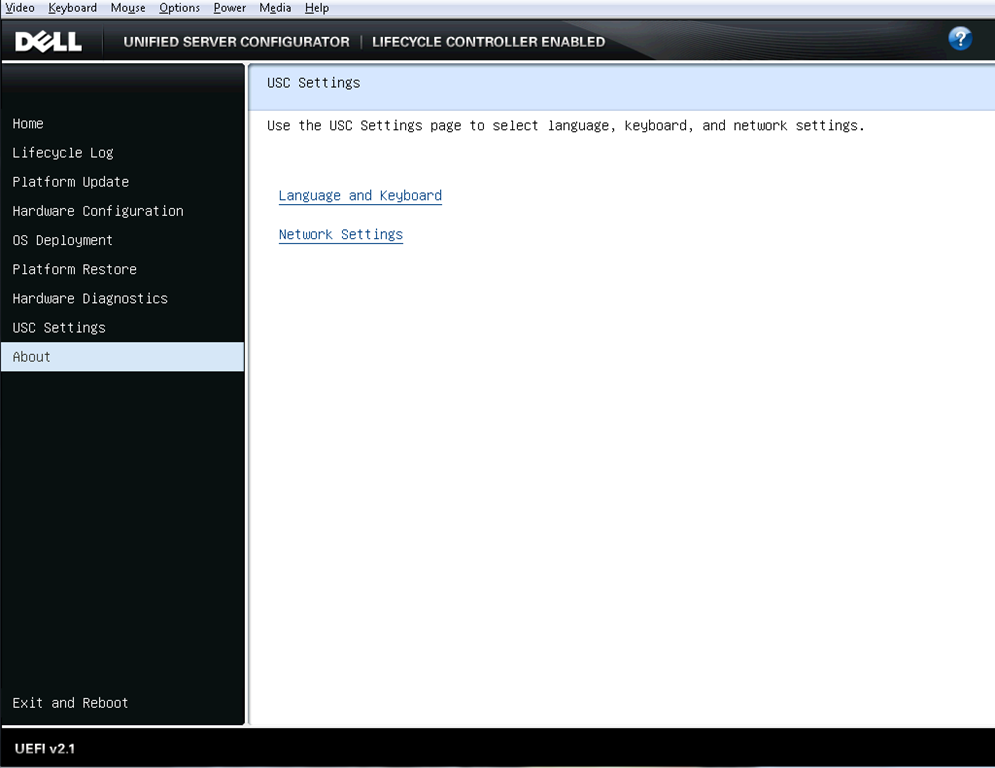
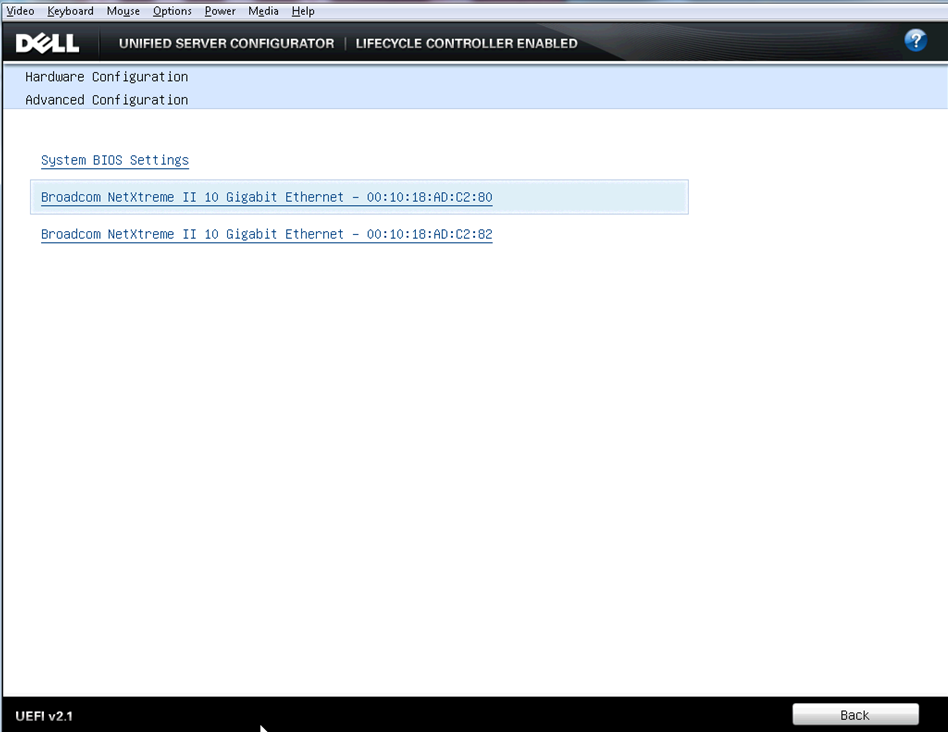
Then choose tab over to HII Advanced Configuration
You will need to do the following twice, once per nic.
->show interconnect enc0:*
Displays interconnect modules in all bays of a specific enclosure
->show interconnect-mac-table enc0:1
Displays the module MAC table for the module in bay 1 of enclosure enc0
The resulting output seems to be far too much info, with no way to sort through it. I just had putty output to a .txt file and then searched it for the mac address in question.
d15 00:50:56:3B:0D:2B Learned 4 -- --
d5 00:0C:29:73:6C:11 Learned 5 -- --
(lag) 00:50:56:3B:07:91 Learned 4 26
d7 00:50:56:8D:00:00 Learned 4 -- --
The ‘d’ number on the left tells you which blade the VM lives on.